# Push Notification - Cloud Messaging
主要參考:https://medium.com/@mikru168/ios-google-notification-firebase-cloud-message-c2849117be08 現在只記錄一些要注意的部份
##Flow
3. 從 key chain 匯出 .certSigningRequest (CSR) 檔案
.cer(憑證檔) 參考 (opens new window) 憑證檔的用意是要告訴 Apple 說這台電腦是開發者在使用的,若在本機沒有安裝是無法打包 App 上架的。另外憑證是會到期的,一年後必須重新安裝,到期日即為從註冊成為開發者後開始算一年。
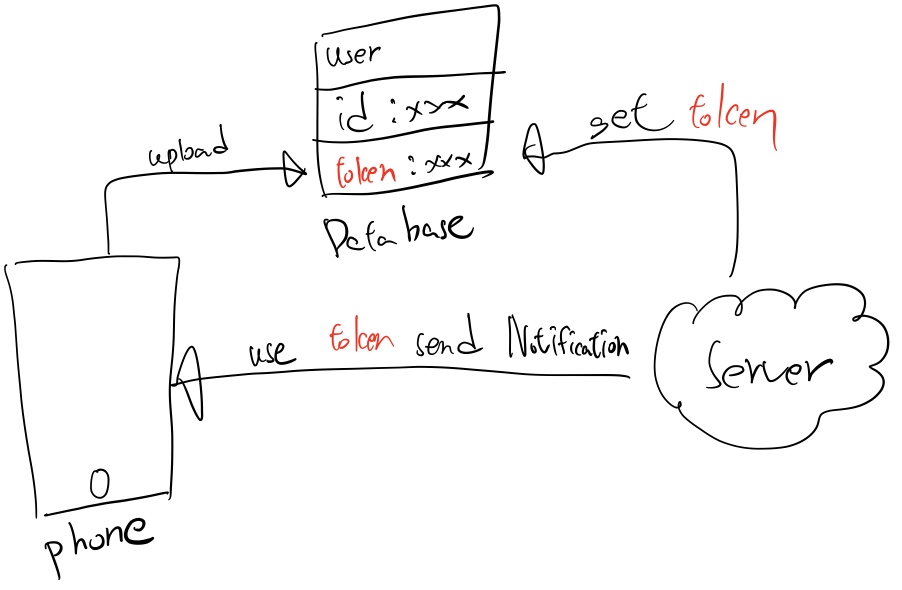
# 取得 DeviceToken
通常是給後台人員利用各種語言來推播時用的 Token,在實務上通常在收到該 Token 會將它送到後台並且和帳號綁定在一起,以利後續針對單一帳號推播使用。以上是被動的接收 Token。而有些時侯我們得必須主動的去跟 Firebase 要 Devie Token 的,語法如下
InstanceID.instanceID().instanceID { (result, error) in
    if let error = error {
        print("Error fetching remote instance ID: \(error)")
    } else if let result = result {
        print("Remote instance ID token: \(result.token)")
    }
}
# 測試單一裝置
# Firebase console
- 首先要拎個
DeviceToken - 輸入
DeviceToken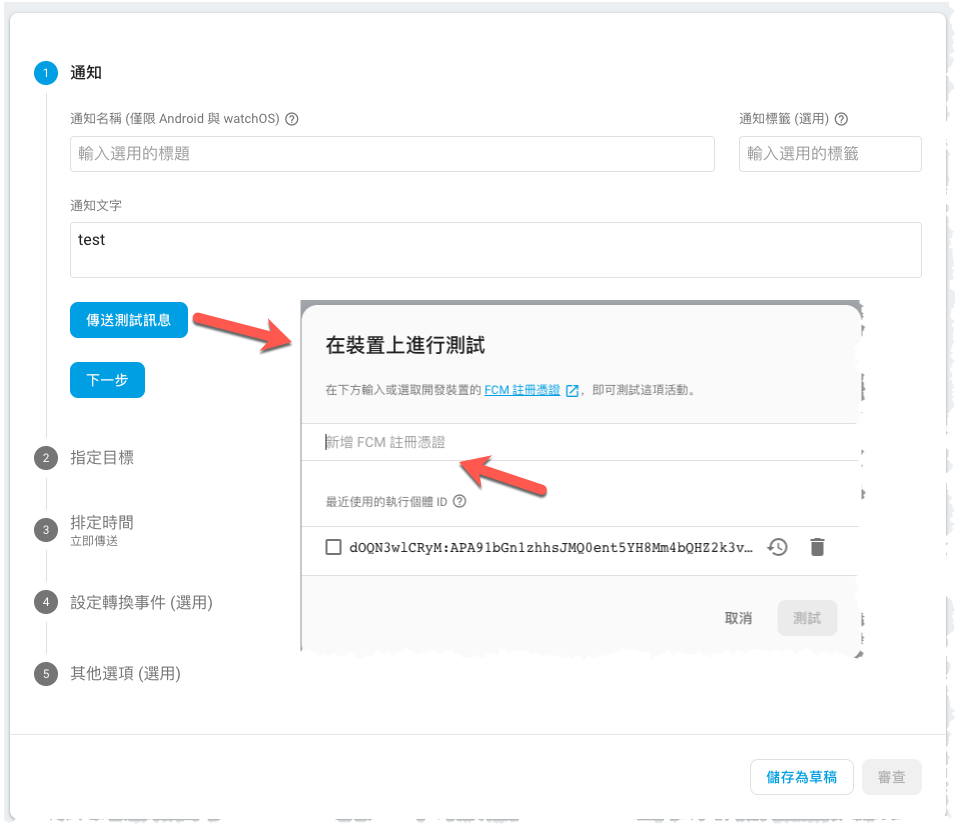
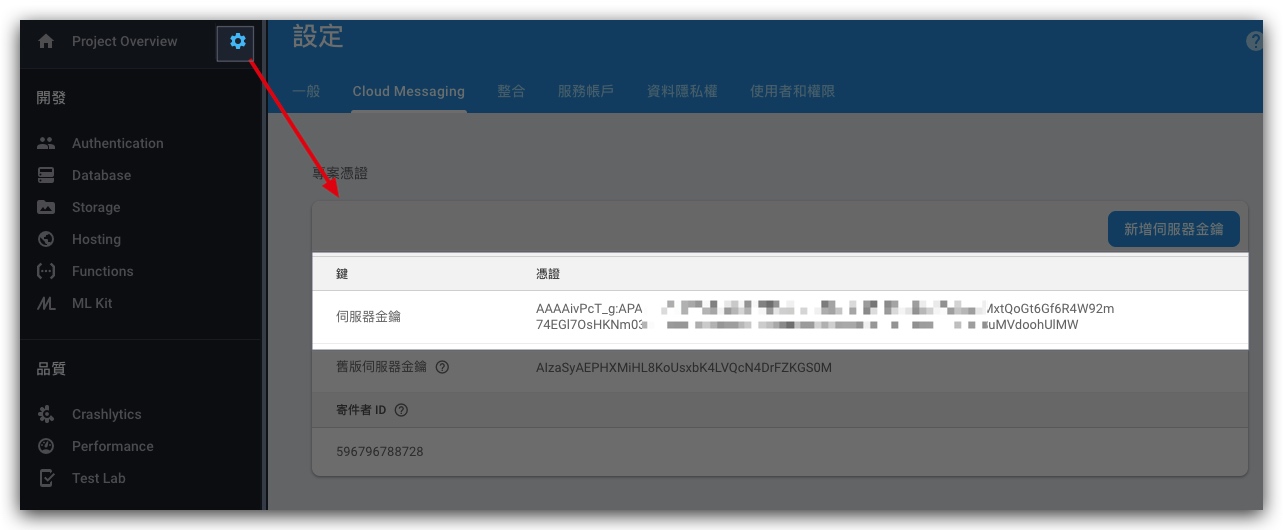
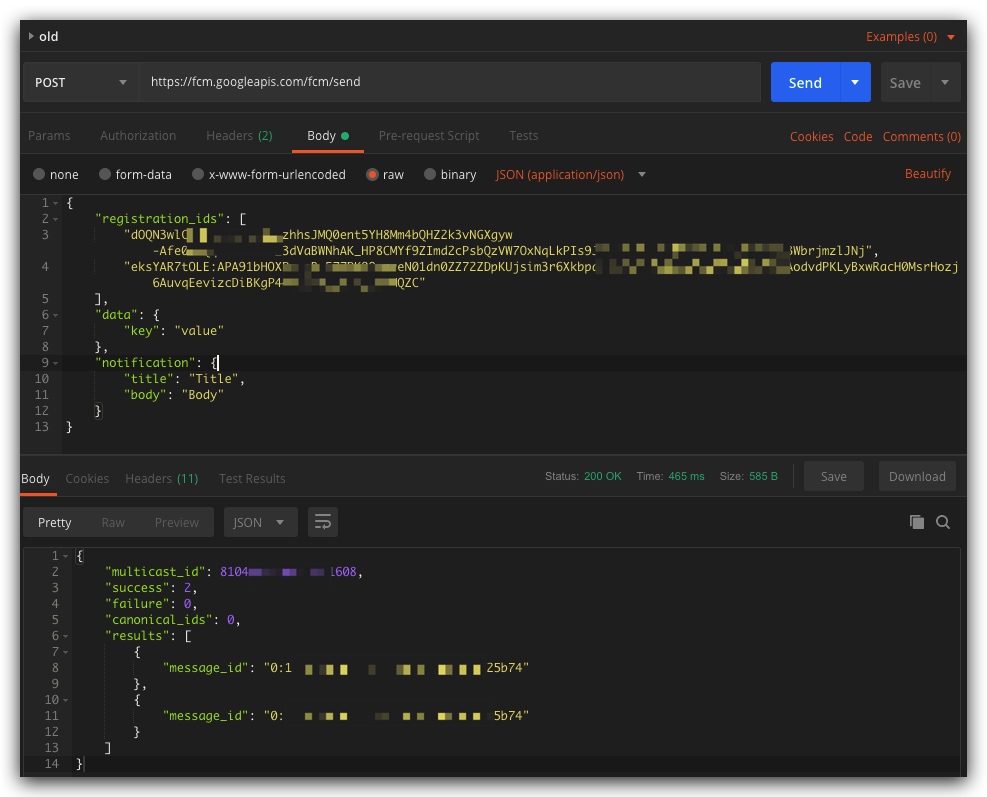
# Postman(REST API)
旧版 HTTP 服务器协议: https://firebase.google.com/docs/cloud-messaging/http-server-ref
伺服器金鑰:
//POST:
https://fcm.googleapis.com/fcm/send

//Headers
Content-Type:   application/json
Authorization:  key=伺服器金鑰
//body
{
    "registration_ids": [
        DeviceToken1,
        DeviceToken2
    ],
    "notification": {
        "title": "Title",
        "body": "Body"
    }
}
贊助商連結